USB2HSD Method in a nutshell
Source https://www.drive2.ru/b/646562041351386364/ (among others)
- Do not insert power until the manual tells you!
- Put SD card with toolbox into the unit.
- Copy the folder "patcher" to "C:\"
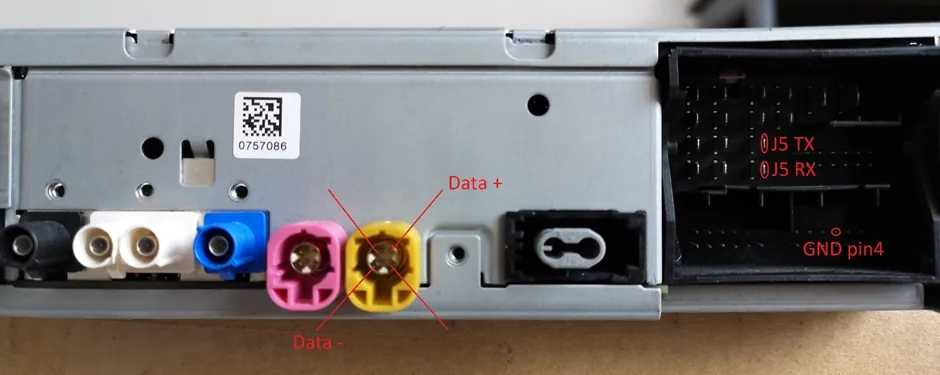
- Prepare both UART Devices. Open two putty windows. The BAUD Rate is 115200 each. The J5 Quadlock pins are the same on ZR and PQ. Connect GND, J5 TX/RX and iMX6 TX/RX to UART device. One Ground connection should be enough!
-
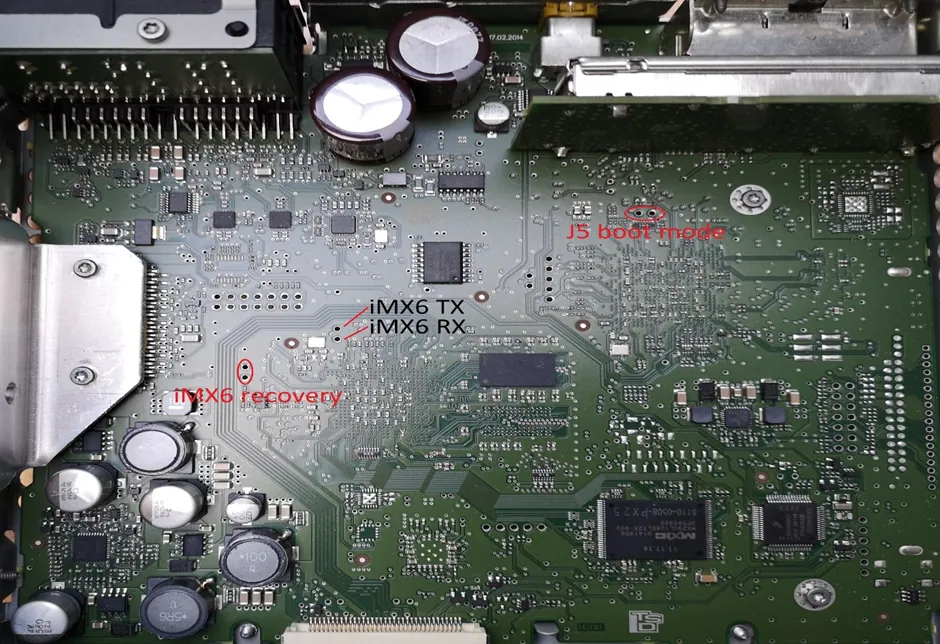
Short the points "iMX6 recovery" and "J5 Boot mode". Leave them shorted all the time.
-
Open cmd as admin and enter cd C:\patcher
- Type in plus1.bat but not hit enter yet.
-
Power on the unit.
- Go to the cmd, where plus1.bat is and hit enter. You will hear USB disconnect sound afterwards.
- Just after that, type plus2.bat and hit enter.
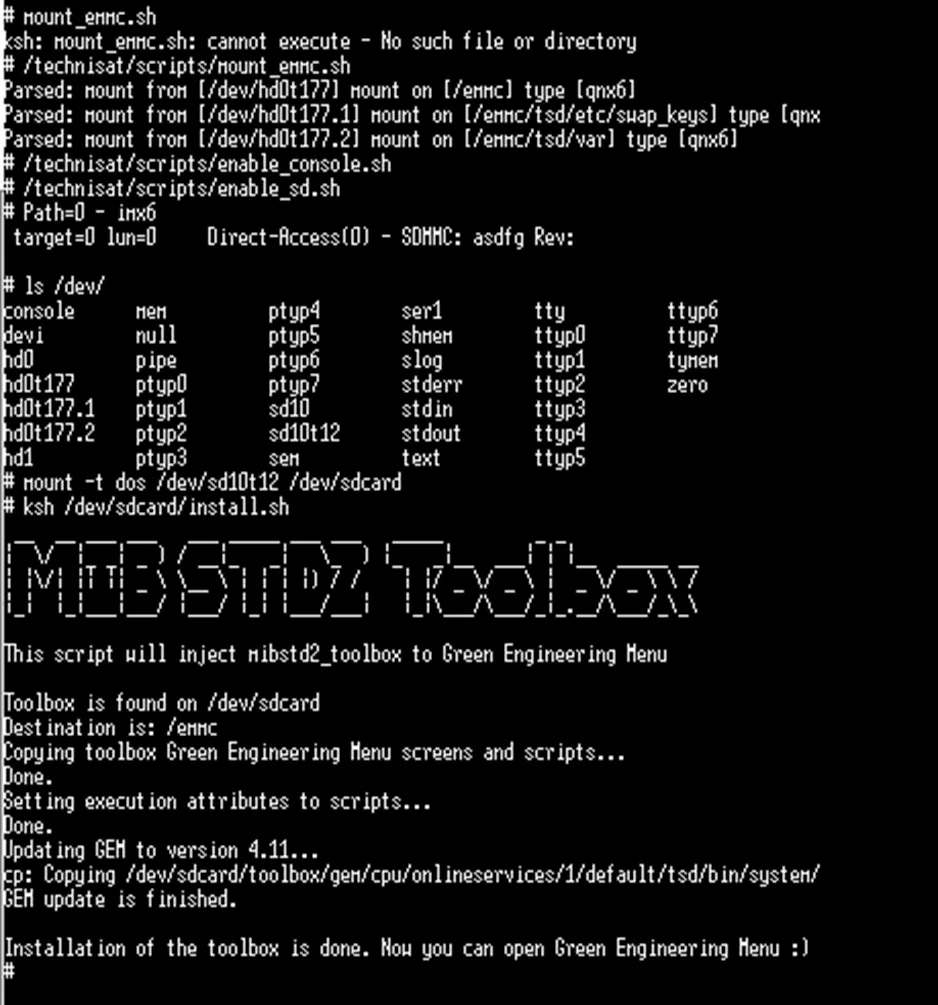
- In the iMX6 windows, when you see a #, hit enter several times. It will give you access to the shell. Type the following prompts:
ls /technisat/scripts/
/technisat/scripts/mount_emmc.sh
/technisat/scripts/enable_console.sh
/technisat/scripts/enable_sd.sh
ls /dev/
mount -t dos /dev/sd10t12 /dev/sdcard
ksh /dev/sdcard/install.sh
After that done, you can unplug power and remove connectors and tweezers from the board. Toolbox is installed now.
The following screenshots shows a successful installtion of the toolbox.
Community content mirrored from mibwiki.one. Always make a backup before flashing or coding a unit.